From Text to Art: The Storyboards
Because I am both the writer and the artist, I bypass the step of writing a traditional script for The Last of the Polar Bears, and work straight from a detailed synopsis to rough thumbnail pages. This allows me to be very flexible with my roughs. I read over my synopsis, then visualize the look of the pages as thumbnail drawings while I’m breaking down the actions panel-by-panel. In this way, I can quickly discover whether scenes that are easily described in text work visually, and make necessary corrections.
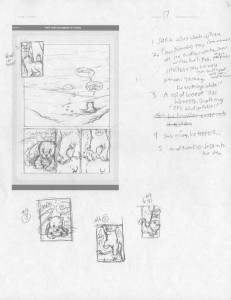
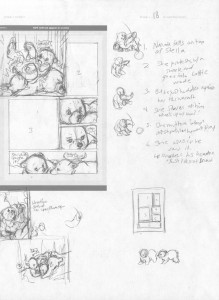
Here’s page 17 and 18 from synopsis to rough thumbnails, in which the twin polar bear cubs Stella and Nanook experience the outside of the den for the first time:
Synopsis:
Stella asks Nanook what’s up there. The next panel is his point of view. Endless white snow, and arctic twilight. Frostbite (an arctic fox) is also in the shot, but she is well camouflaged. Her tail is wrapped around her face so that she looks unremarkable, like a lump of snow. “Nothing. Everything’s white!” A cold breeze sets his teeth chattering. “It’s cold up here!” Shivering, brother cub tumbles back into the den, and falls on top of Stella. Stella protests and goes into battle mode, but he just huddles against her for warmth. It’s no fun to play with an unwilling partner, so she gives up and calls him a wimp . She asks him if he saw “it”. He shakes his head no. “Just lots of snow.”
I breakdown this description into a list of panels, each with a short description of what I want to bring to the attention of the reader. My thumbnail page layout (template here) measures 4″x6″ on an 8.5″.x11″ page and contains pertinent information such as trim and bleed so that I can plan out the overall look of the page along with composition, actions, and word balloon placement.
Sometimes the pages come together in a very straightforward fashion. Sometimes I’ll end up trying multiple panel configurations. On page 17, you can see that I’ve come up with alternate takes for panels 1, 3, and 5.
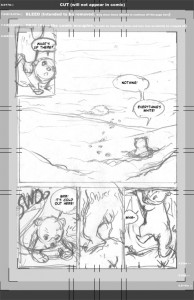
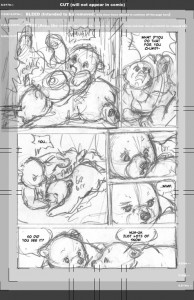
Once the thumbnails are drawn, I scan them into the computer and assemble the pieces. Here’s how 17 and 18 currently look.
These thumbnails are my roadmap for the next step: penciling the pages at full size. With composition and content of the panels figured out, I’ll be able to turn my focus to drawing the characters tighter, cleaner, on model, and anatomically correct (to name just a few of many things I’ll be keeping in mind as I work through the pages).
I’ll continue to delve further into aspects of my comic creation process in upcoming blog posts, so stay tuned for more.


Discussion (4) ¬
Hello
Our friend FRANS* from the NETHERLANDS has introduced your site to us.
“We” that’s a whole bunch of polar bear lovers, mainly KNUT-fans in Berlin.
I personally like best your studies! Wonderful! Congratulation.
Wishing you success with your book projects.
Greetings from Dumba from autumn-sunny Gemany
*See at 03.10.2010 13:30
*See at 03.10.2010 13:30
http://f3.webmart.de/f.cfm?id=3060890&r=threadview&t=3046587&pg=1356#16758361